Web Interface for Retroshare - Final Update
This is a mirror of a post I wrote on the Freifunk blog.
The GSoC program is about to finish, and this will be my last GSoC-related blog post for Retroshare’s new web interface.
I will use this blog to provide an overview of how the app works, all my work done during this period, features, completed milestones, what couldn’t be completed, and future roadmap. I will also explain and document the code structure in the hopes that potential contributors will find it easy to get started.
- The source code is present here: https://github.com/RetroShare/RSNewWebUI
- And my fork over here: https://github.com/rottencandy/RSNewWebUI
- If you want to see the work I have done exclusively during GSoC, it is all in a single Pull Request: https://github.com/RetroShare/RSNewWebUI/pull/1
Overview
The purpose is very simple; A web-app that can be used to manage your Retroshare node, interact with friend nodes, and make use of Retroshare’s features. In other words, an alternative to the Qt-based interface of the client app.
This is made possible through the JSON API provided by Retroshare, which allows everyone to utilize the power of Retroshare’s technology to create their own services, interfaces, or even build apps on top of Retroshare.
The web interface itself works in a pretty straightforward manner, making use of modern browsers to act as a front end for the Retroshare platform and it’s services. Made using JavaScript, and the only external library being used is Mithril, which is a very fast and lightweight framework for building single page web applications.
Build Process
If you look at the source code, you can see that it is built using qmake, the config file webui.pro executes build scripts in webui-src/make-src.
webui-src/
├── make-src/
│   ├── build.bat
│   ├── build.sh
│   ├── chat.css
│   ├── init.bat
│   ├── init.sh
│   ├── main.css
│   ├── readme.md
│   └── template.js
The build scripts in webui-src/make-src (most notably build.sh) iterate over all files from the source directory(webui-src/app), copying files into their respective destinations.
All JavaScript files are compiled into app.js and CSS files into app.css, these compiled files are put into the destination directory which is webui.
The build scripts also copy all the static files, from webui-src/assets over to the destination directory, maintaining their directory hierarchy.
Static files are the ones that do not require any modification in order to be used, like the HTML, font files, some CSS styles, and so on.
Another important aspect of the build process is how it compiles all the JavaScript files into a single file.
Since CSS is simply a set of rules without any structure, the output file can be built simply by appending all the source .css files together, JavaScript however doesn’t work that way:
You may have noticed another file in make-src called template.js.
This file is used to create an entry point for the JavaScript files. It can be thought of as a kind of polyfill for require.
What this essentially does is, take all the .js source files and store them using objects in such a way that they are isolated from each other, and then enable interaction between them through exporting objects.
To make a module’s components public, we have to refer them in the module.exports object, and we can use them inside other modules by importing them using the require() method.
The module.exports object is the only data that can be accessed outside of the module.
Structure
Now that we know how require() and module.exports work, we can look into how the source code functions:
app/
├── channels/
│   └── ...
├── chat/
│   └── ...
├── config/
│   └── ...
├── files/
│   └── ...
├── home.js
├── login.js
├── mail/
│   └── ...
├── main.js
├── mithril.js
├── network/
│   └── ...
├── people/
│   └── ...
├── rswebui.js
├── theme.css
└── widgets.js
The source files are all in webui-src/app.
I have tried to implement a structure loosely based on the MVC design pattern.
Aside from separating data and views as objects and components, it makes intuitive use of Mithril components and routing concepts.
Each folder contains the views and models for a single tab. All tabs have their own route resolver that takes in the route parameters and resolves them to return the correct views for rendering.
The entry point of all tabs happens in the resolver file, which also defines the layout of that tab. I will explain layout types shortly.
Note how the file names consist of their respective tab names too.
This is not just for convention, our require polyfill does not yet have the concept of directory structure, any file present in any directory and may be imported by using only it’s name.
This causes issues when accessing files having same names, which is why tab name supersedes the file name.
It is important to have unique names for all files.
The main.js file contains mithril’s m.route, that defines the routing table and allows all navigation on the app.
It detects whether the login keys have been verified and upon failing, reroutes to the login page using the onSuccess() callback.
The rswebui.js contains methods that act as the bridge between the web interface and the Retroshare client.
Mainly, abstracting the API calls and managing async background tasks.
In a previous post, I mentioned that I did a lot of reading on UI and UX design, highlighting how it shaped the look and feel of the web interface.
After learning the importance of consistency when studying interaction design, I set out to make the interface more consistent.
In a nutshell, consistency refers to having uniformity in the UI, a form of repetition such that an action becomes predictable and intuitive to the user.
It can easily be achieved by having a predefined set of rules on how the UI should behave when interacted with, and the best way to do this is to make a set of reusable components.
And since this is about the UI and visuals, it has more to do with CSS than JavaScript. Most of the layout rules are defined in theme.css.
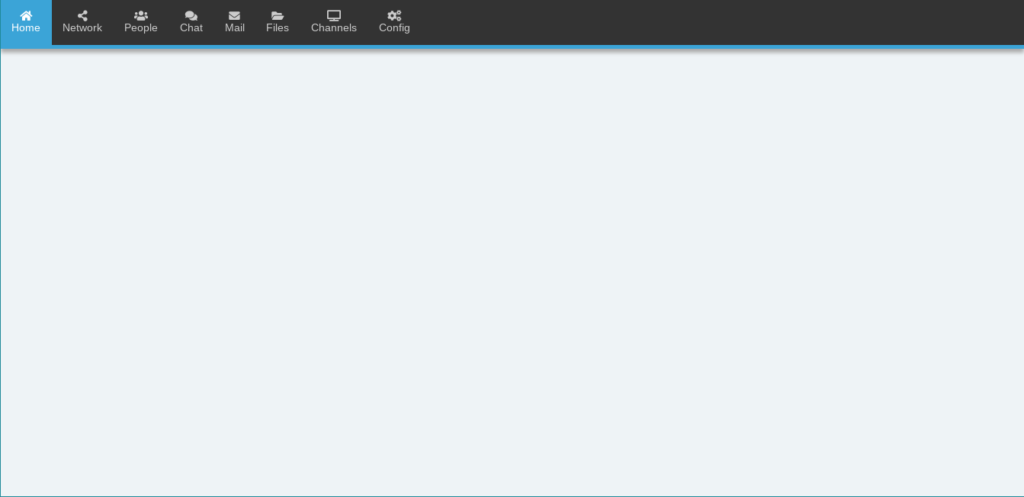
The CSS class that houses all other widgets is the tab-page class.
It’s the one containing all the elements under the navbar.
All top level tab layouts use this and extend upon it.
It can hold both full and half-width widgets, and position them according to the space taken by each.
The next is the sidebar class, which defines the sidebar on the left of some tabs, allowing to choose sub sections within the tab.
It must be used when there are multiple sections but are logically grouped inside the same tab.
Since this is a very commonly used widget, I have put this inside widgets.js, a file that contains a collection of the most used components, so that it is easily available everywhere.
It takes in two parameters: the list of sections, and the base route link of the tab.
Note that the section link must be the same as it’s name for it to be resolved properly:
m(widget.SideBar, {
  tabs: tabsList,
  baseRoute: '/route/',
});

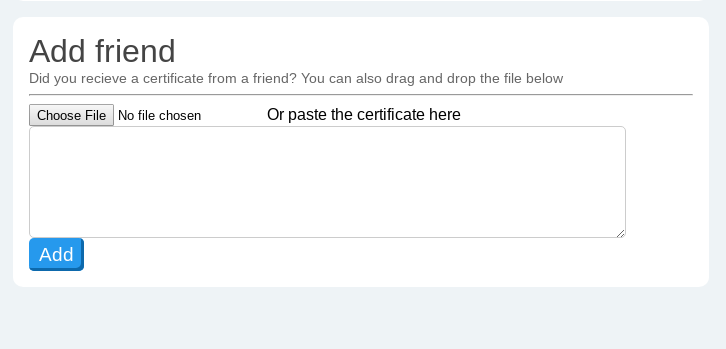
The widget class is used as a preliminary frame for displaying small groups of input types together.
For consistency, a directly interactable input must never be shown directly inside tab-page, but must be inside at least one widget frame.
For additional uniformity, I have been using the <h3> followed by the <hr> tags as the immediately following elements to display and categorize a frame’s contents.
The progressbar widget is a combination of a <span> tag relatively placed inside a <div> tag using the block-inline display attribute.
To create the progressbar in mithril, just use:
m('.progressbar', {
  style: {
    content: rate + '%'
  }
}, m('span.progress-status', {
  style: {
    width: rate + '%'
  }
}, rate));
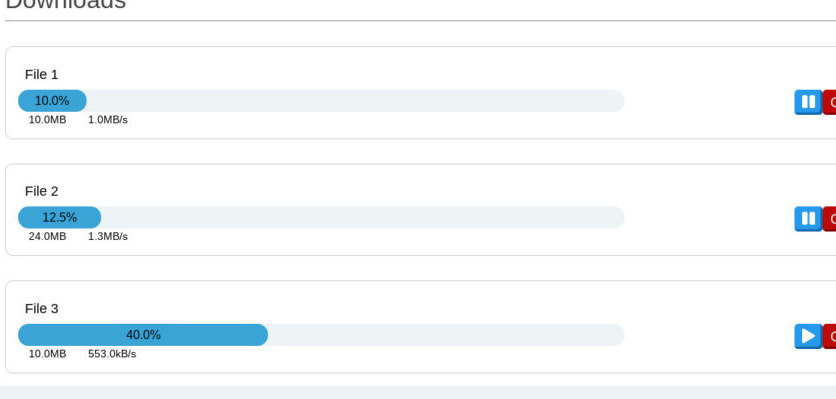
And the CSS will handle the rest.
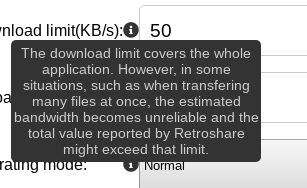
The tooltip widget can be used to display additional content when the mouse pointer is hovered over it. And can be easily created using:
m('.tooltip', [
  m('p', 'normally visible content'),
  m('.tooltiptext', 'content visible when hovered'),
]);
A modal or popup box can be used to display content which might be triggered by a user’s action, or can display information that requires immediate attention of the user.
This is also present in the widgets.js file.
It is made as a mithril component, so can be used normally with the m() selector.
It also takes in other mithril components as attributes, allowing it to display any given html tag.
widgets.popupMessage([/* Array of components to render */]);

Creating custom input types making use of the <input> tag is incredibly easy in mithril, but may initially be confusing to programmers used to vanilla JavaScript for event handling.
Normally, to create a JS-controlled input field, you would do something like:
let text = document.getElementById('input').value;
But mithril components can be controlled very easily by making use of the onchange and oninput event handlers:
m('input[type=text]', {
  value: text,
  oninput: (e) => text = e.target.value,
});
And text gets automatically updated with any value the user enters.
Use oninput to get value after all the text is entered, and onchange for more finer control, which is fired every time a button is pressed.
This method can be used with any input type like text, number, radio, checkbox, etc. and can be made to run any function, allowing for huge flexibility and control.
Features
All the features and milestones that were successfully completed:
- Get your certificate, add new friends by copying in their certificates.
- View, manage your identities and get info about friend identities.
- View and manage all your friend nodes and each of their locations, and basic info about them.
- Get info about your upload/download files and manage them, add new downloads through links.
- Check all your mails.
- View info about subscribed chat lobbies and publicly available lobbies.
- Change various configuration options of your Retroshare node such as network limits, file locations, default behavior, and such.
Roadmap
Retroshare has a huge amount of features, and unfortunately this period wasn’t enough for me to cover all of them into the web interface. I plan on implementing the incomplete tabs and then extending the app with new functionality:
Turtle search:
As my mentor Cyril told me, this feature is very important since it makes it very easy to find and download new files, and is one of the features making use of stream data from the API.
Getting stream data has been a problem due to CORS implemented on browsers, which is the reason this feature couldn’t be finished. I am constantly looking for a viable solution and will immediately finish implementing this when I find one.
Sending mail:
The web interface can only read mails for now, and it would be very nice to be able to send mails too.
Forums:
I have already started work on the forums tab, and will finish it soon. This will allow users to interact with and manage forums entirely from inside the web interface.
Channels:
Similarly, I am also working on channels. Another nice feature to have on the Web UI.
Build Process:
As shown above, the current build process is very barebones, and the require polyfill has no concept of directory hierarchy.
This will eventually cause issues as the app grows.
We need to upgrade the build tools, or find a new one.
I think the most important point to keep in mind if choosing to go with a new one, is that the user should not have to install any additional dependencies.
That’s about it. I encourage everyone to try out the app, it is very easy to install the web interface. There are even simple installation instructions on the source page! Feel free to get in touch if you have any suggestions or queries. You can generally find me lurking in the Developer forums in Retroshare.
Many thanks to Google, and the amazing Freifunk community, especially my mentors, for giving me this opportunity. This has been a wonderful time for me, I learned a lot of new things that would help me contribute more towards free and open software.